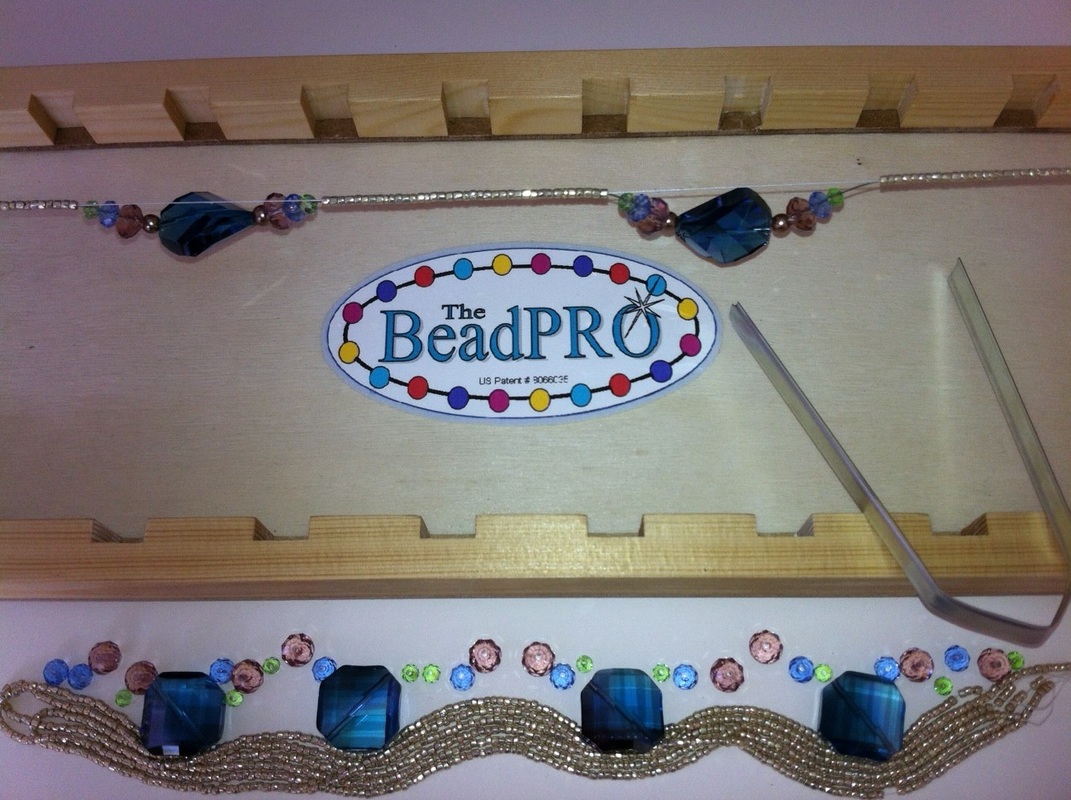
HOW THE BeadPRO WORKS
Many beads are sold on strings. These are "temporary" strings that display the beads.
Using the BeadPRO The idea is to restring them onto a "permanent" wire or beading string along with other focal and accent beads creating custom patterns & designs.
The BeadPRO method is simple:
Instead of cutting these beads off the temporary strings and beading them one by one - starting over - finding all those tiny holes again, keep them on the string and rewire them using the BeadPRO.
Someone already found those holes for you -
why should you do it again? Just restring them directly from the strand.
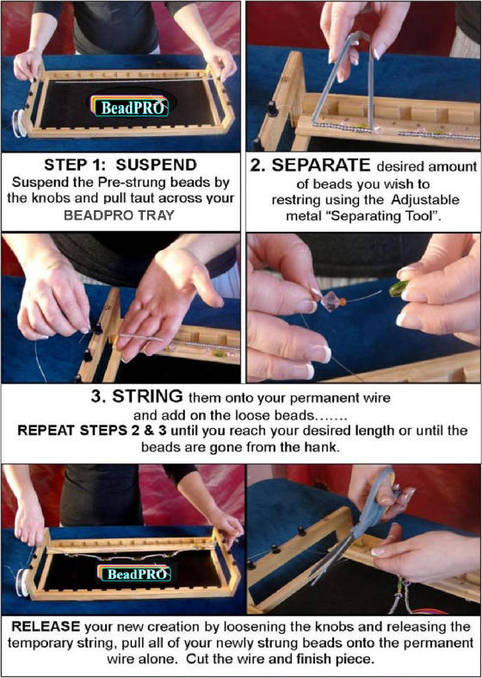
Take a strand of the pre-strung beads and suspend them across the BeadPRO tray by the ends just under the rubber knobs and wrap once in a clockwise direction. Tighten the rubber knobs and the pre-strung beads will line and ready to be restrung onto your permanent wire or string and needle. NO MORE BEADING ONE BY ONE
Now you don't even have to count the beads - using the BeadPRO separating tool, just separate a row out in the desired amount of beads for your pattern. Start from the right side if right handed and the left side for left handed users. String on the selected row of pre-strung beads ~ pull the wire or string all the way through. Then add on a pattern of accent beads and focal Beads to create a pattern. Separate out another measured row with your separating tool again, same measurement, string them, and you now have a perfect custom pattern. Repeat these steps until you reach your desired length. When finished or you run out of beads on the temporary string, release your knob and pull all the newly strung beads onto your permanent string or wire alone. Finish the piece with clasps or togles. Instructions are included with your BeadPRO Beading System and Tray.
Be creative with your colors and have fun creating custom bead creations!
HERE ARE BASIC INSTRUCTIONS BELOW
Easily slip your wire through the measured section of lined up beads! Add on some focal beads and accent beads to your line, then measure out another section of the pre-strung beads and string another row and Repeat... Quickly creating endless patterns and designs. What is even more amazing is that all the stringing you are doing is still temporary, and any mistakes or changes can be fixed or made before the beadwork is permanent! How many times have you made a lineup of beads and decided you should have used a different color or measurement? The BeadPRO not only makes beading up to 10X faster, it makes it fool proof. You can create so many custom patterns and beading designs quickly and easily with very professional results. Make Beaded Curtains, Necklaces, Bracelets, Hanging Crystals (left), a Beaded Garland for trimming a lamp shade or a Christmas Tree. IDEAS ARE ENDLESS A custom beaded curtains can be made in a day or two....
AMAZING REVOLUTIONARY TOOL MAKES IT SO EASY!
AMAZING REVOLUTIONARY TOOL MAKES IT SO EASY!


